Secrets to Award-Winning Astrophotography | Astrophotography with Luke Tscharke Part 3
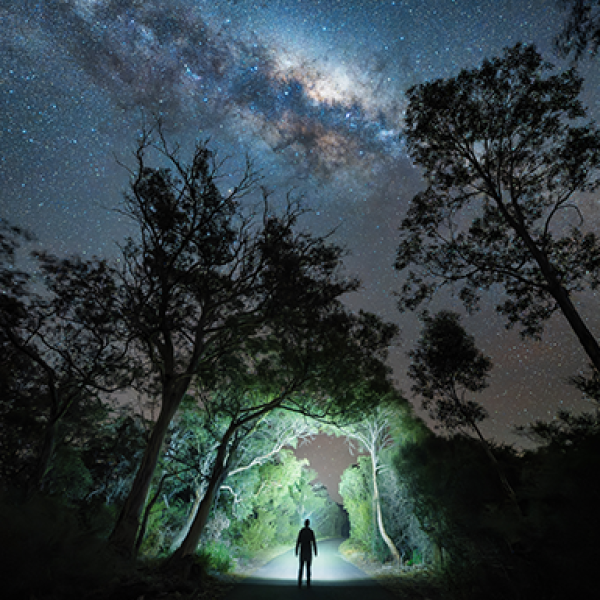
Highly acclaimed photographer Luke Tscharke has always been fascinated by nightscapes, especially the Milky Way, and the thrill that accompanies shooting them. In 2014, he took the plunge and purchased an Alpha 7S. From then on, astrophotography changed for him.
“At that time, there were no other cameras like it. Its incredible low-light performance could capture night images that really stood out. It inspired me to travel to locations within 25 km from the heart of Sydney, where I lived, and photograph the night sky, including the Milky Way,” said Luke.
To support his camera, Luke took his time to research the lenses best suited for astrophotography and learned that Sony’s wide-angle prime lenses had all the requirements for taking his snaps of nightscapes to the next level. “I think a combination of finding the best equipment and researching the best techniques and locations has enabled me to capture images that I never could have dreamed of capturing at the start of my journey.”
Galaxies, constellations, planets, and the moon are popular subjects of astrophotography. If you are into capturing astonishing nightscapes, you’re in luck, as Luke bares his award-winning astrophotography secrets.
Learning the techniques
Since astrophotography requires specific gear settings and techniques, it’s completely understandable to not perfect it on your first try. To help you get there, let’s dive into Luke’s gear settings and the most useful techniques used in astrophotography:
Camera setting for long exposure
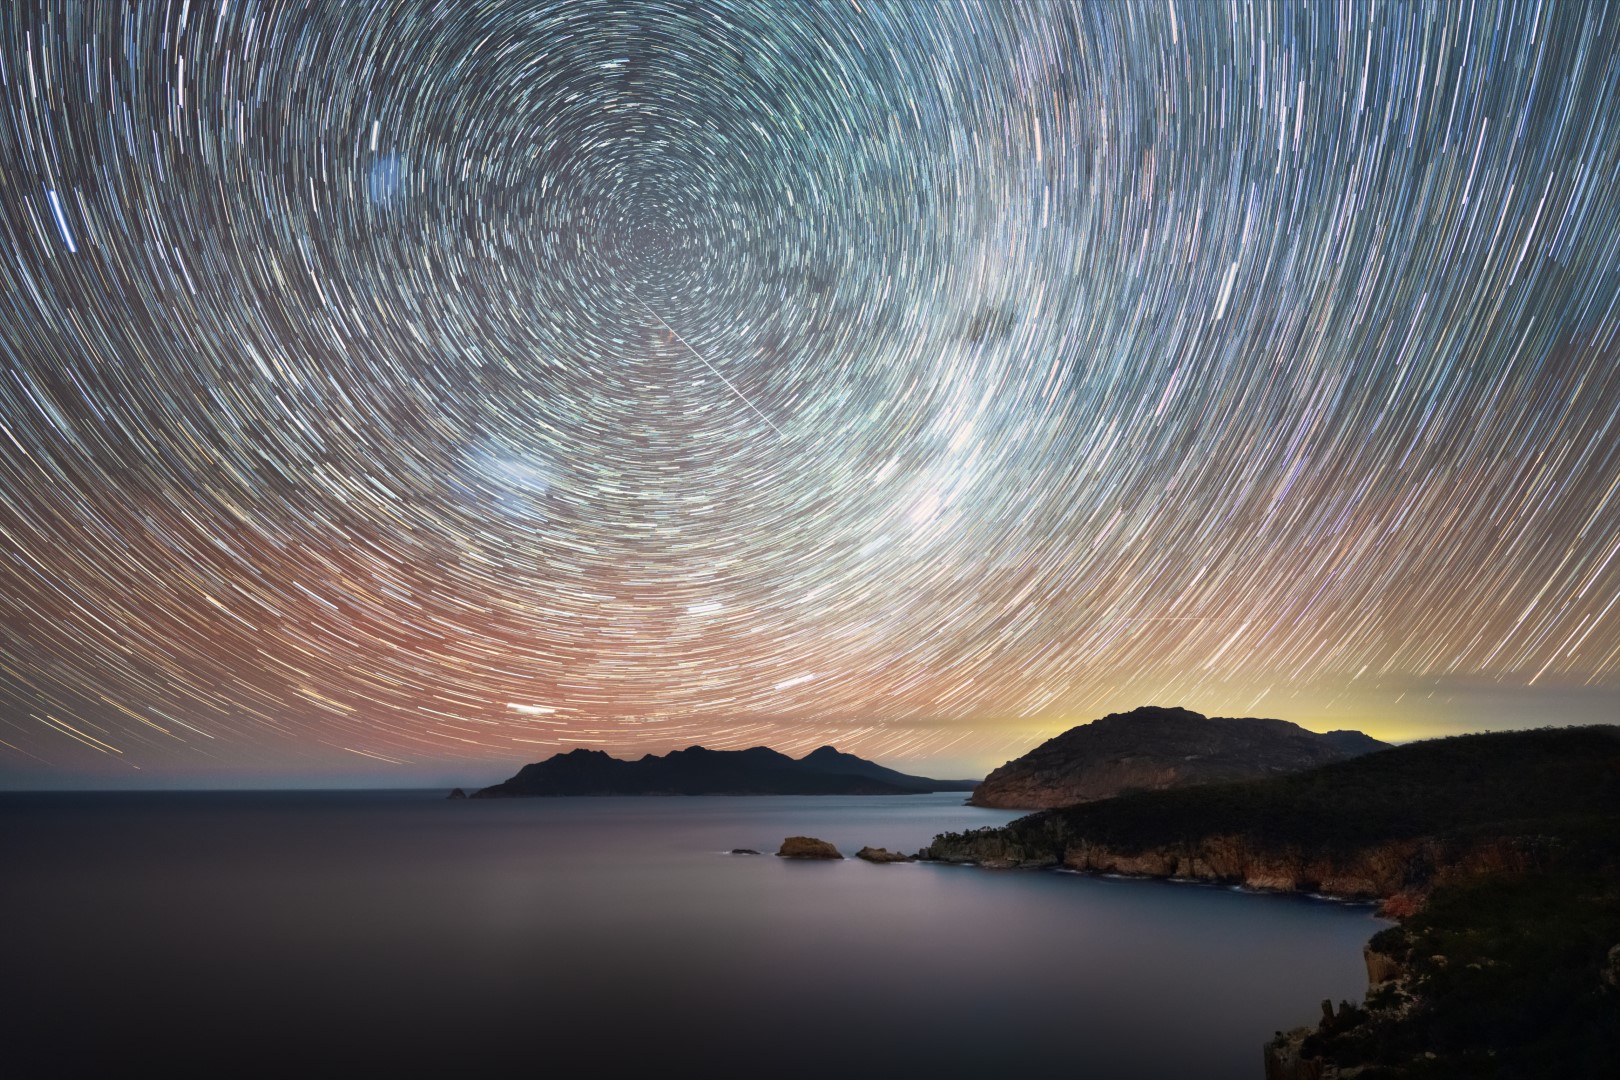
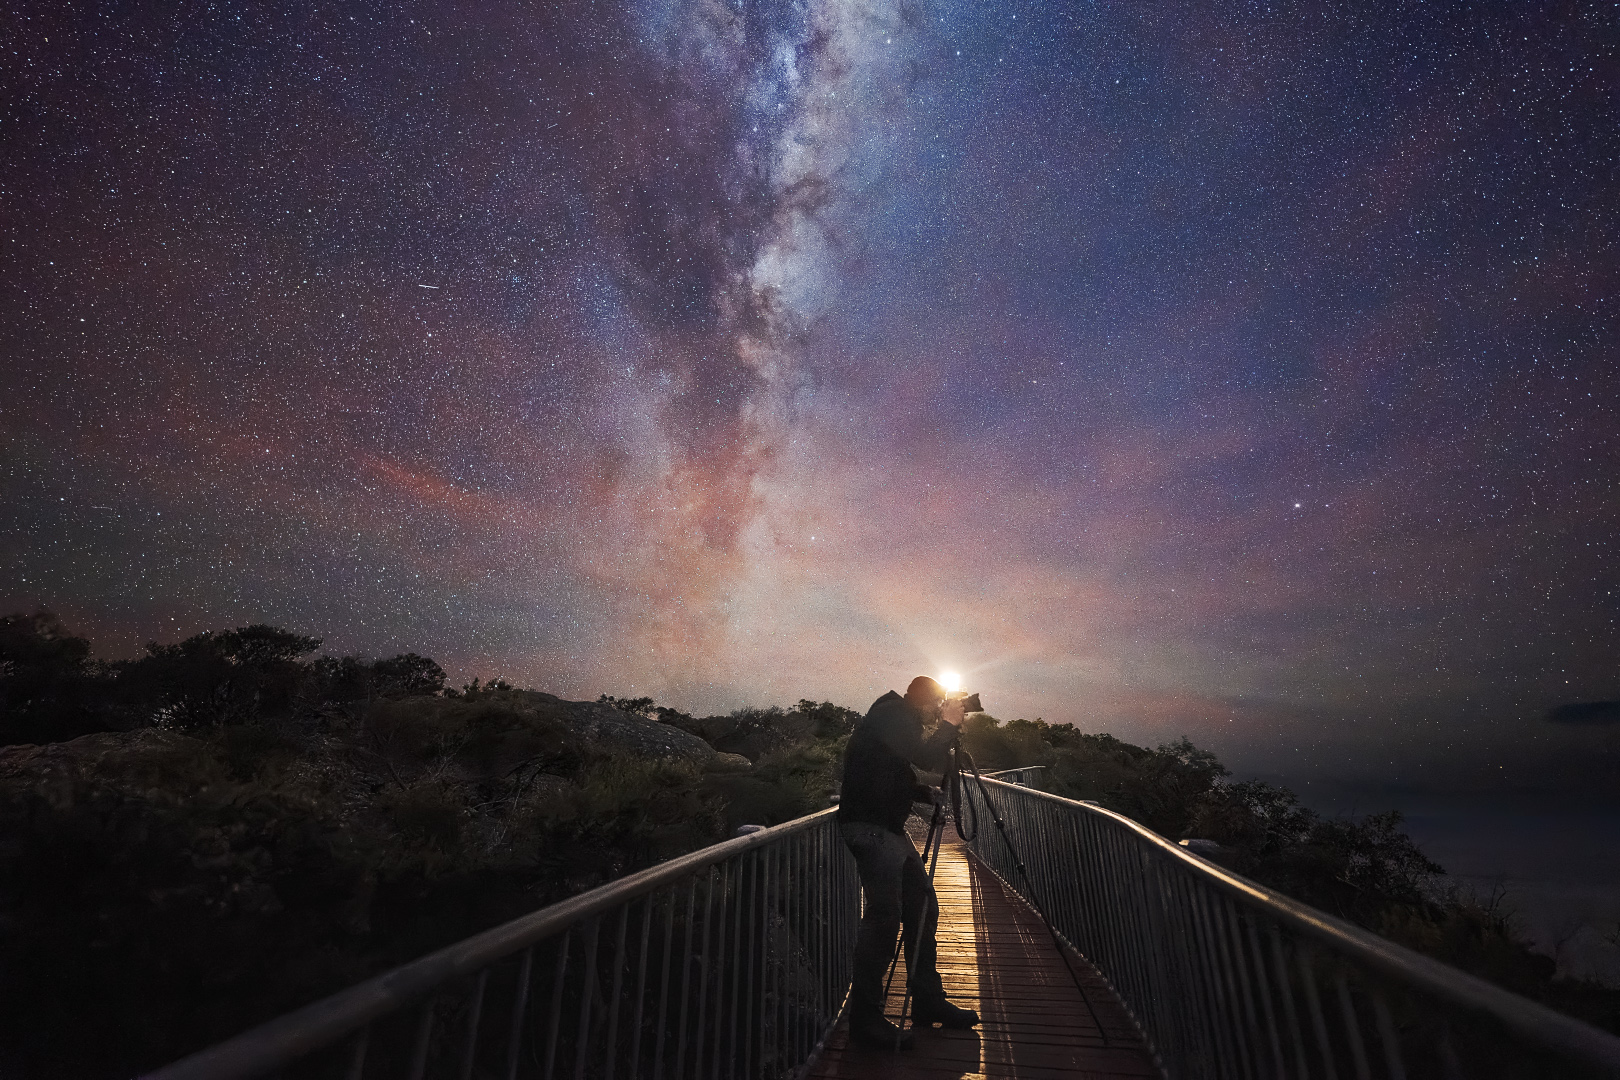
Long exposure in astrophotography gives the camera sensor enough time to capture objects in the night sky in such low light conditions. A great setting to start with is around 20-30 seconds shutter speed. Luke suggests that for exposures longer than 30 seconds, you will need to shoot in bulb mode. To do so, select the manual mode on the camera and adjust the shutter speed way past 30 seconds until it says ‘BULB’. Next, find a way to open the shutter remotely as it will be difficult to press the shutter continuously for several minutes. Luke’s preferred method is to connect the camera to the Imaging Edge app, which allows him to control the exposure more conveniently and operate the shutter through a Sony Bluetooth remote.
“Once you’ve opened the shutter using the remote, you need to set a timer for the desired exposure time and then you can close the shutter once the time has elapsed,” he explained.
Lens setting for unlimited distance
Since these celestial bodies are a vast distance away, it may be difficult for the lens to focus on them. Putting the focus ring to infinity is a common astrophotography technique to set a sharp focus on them. For Luke, however, he prefers to manually focus on his subjects as this ensures that they will be as sharp as possible. “The easiest way is to focus on a light source farthest away, whether it’s a streetlight, the moon and, of course, even the stars themselves,” said the astrophotographer.
Delay shutter setting
Using a shutter self-timer delay is ideal, especially when shooting with a tripod. Generally, Luke sets it to a two-second timer, to avoid blurry images due to the slightest movement from pressing or releasing the shutter on the camera. The delay shutter allows vibrations or any forms of motion from pressing to dissipate first before the capture.
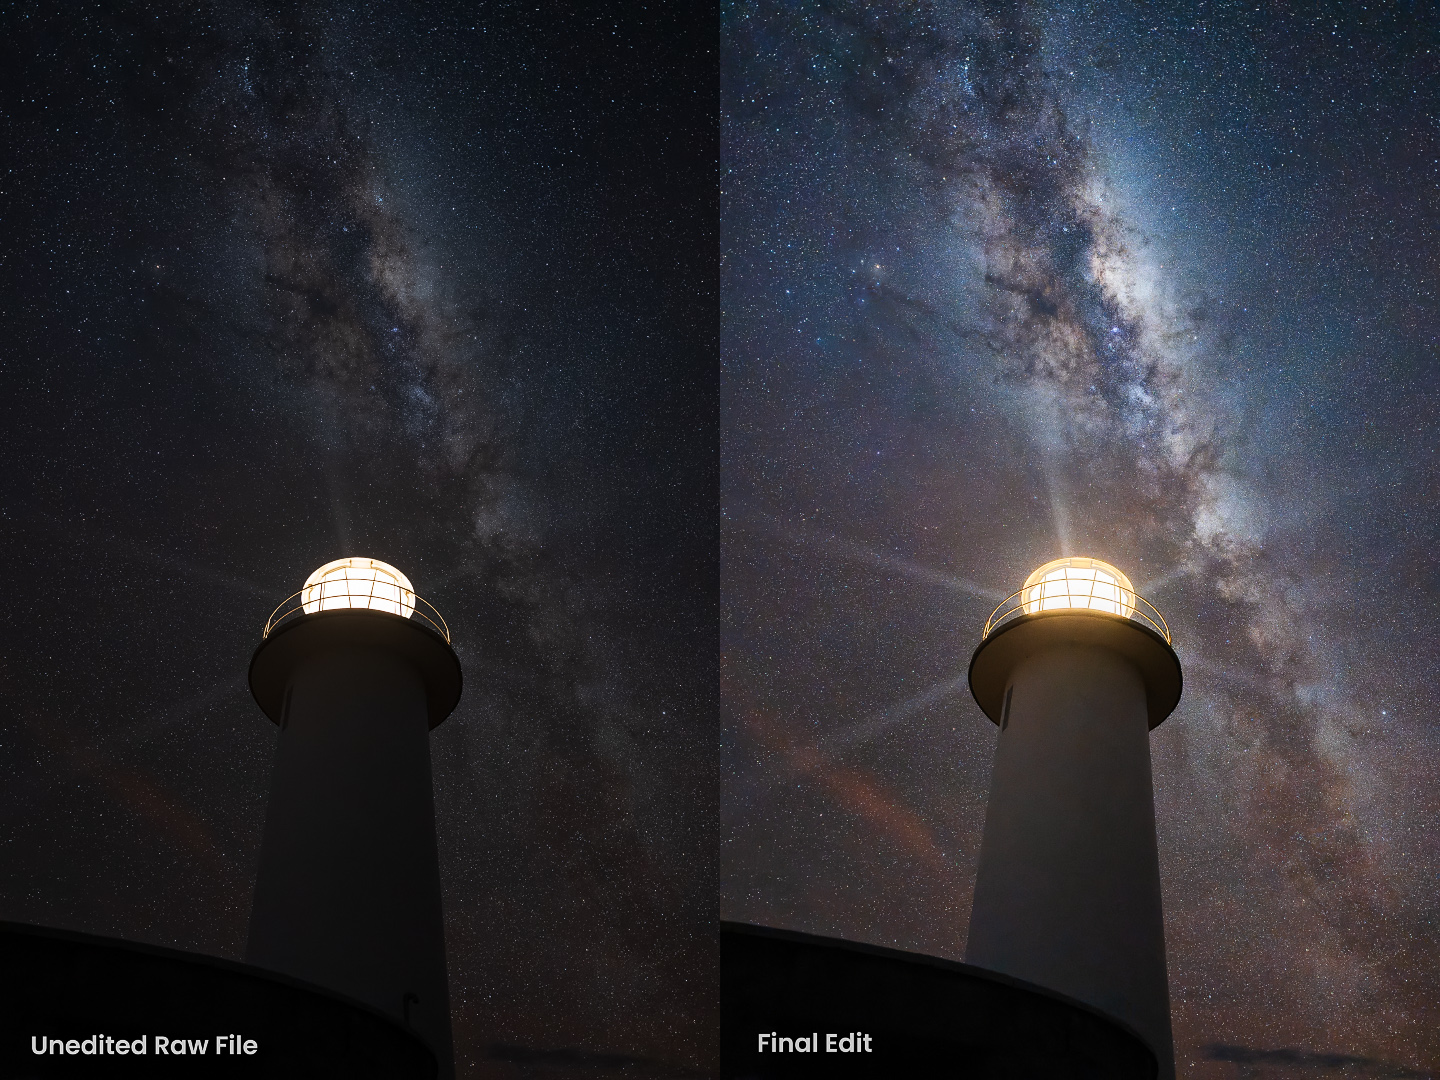
Post-production polishing
Editing is a significant part of night sky photography. Since it pushes the camera’s low light performance to its limits, it may introduce noise and other artefacts and reduce sharpness in detail. Editing the images removes these properties and enhances the overall quality of the image. It also allows the photographer to have better creative control and incorporate their personal style and vision.
In post-production, the most crucial thing to consider is to ensure that the image is already as sharp as possible when captured in camera as this cannot be fully corrected when retouching. Remember that a high-quality edited image needs a high-quality raw image to begin with.
“Fortunately, Alpha cameras have amazing imaging sensors that capture a wide dynamic range of light with low noise levels. This enables excellent highlight and shadow recovery in post-processing, giving a great deal of adjustment options. The sensors, along with the fantastic array of GM lenses, also capture sharp images at very wide apertures, allowing the sensor to detect more light, which is important when there isn’t enough light available,” he shared.
“I try to edit my images as minimally as possible—usually just image blending or colour adjustments and then sharpening for print and web. I don’t create composites, like moving the position of the subjects in post-production because I like to be able to say that the image accurately represents what the night sky looked like when I was there,” said Luke.
Luke mainly uses Lightroom and Photoshop for image editing. For him, Lightroom is the tool to ‘cut the diamond’, while Photoshop is the tool to ‘polish the diamond.’
He uses Lightroom to reduce the contrast of the image and reintroduce the contrast selectively to accentuate the subjects. It also adds a slight vignette using a radial mask, which centres the focus on where the interest is. “Avoiding too much use of the shadow slider can open up the darker areas of the image and reveal some noise. Instead, try reducing the contrast, which may produce a similar effect, but will maintain better noise levels.”
On the other hand, Photoshop is for curves adjustment layers and reintroducing the contrast across the image. It also ensures the darker and lighter areas of the image are more evenly balanced. According to him, “Photoshop is great for additional noise reduction, especially when using various plugins that specialise in that area. I also use it to balance colours and make sure that the overall colour toning is appropriate. I know I’m finished editing when each part of the image feels right, and the colour and contrast are well balanced.”
“Sometimes edits take several minutes but most of the time they take several hours. I generally sit down and start working, and don’t stop until it’s finished and I’m happy with the result!” Luke added.
Honing your skills
It may sound cliché, but the best way to truly improve your skills is through practice, according to Luke. The more you go out there and put your skills to the test, the more that you learn and improve for the next photography session. Having passion for what you photograph makes photography easier as it provides an insatiable desire to go out and capture the world. “I often find myself out in the freezing cold or on a big bushwalk to a location and think that I never would have been able to have pushed myself to do that without great passion. It’s what gets me out of bed at 3 AM despite being all snuggled up in a warm bed,” he shared fondly.
Additionally, the grit to always explore is another essential practice in elevating your skills. It’s important to learn new things in every session, especially when you’re trying something new, and apply all this on your next shoot. Watching tutorials online, reading blogs, and studying the works of the photographers you admire do wonders too.
Finally, your skills need support from best-fit gear. Astrophotography is no easy genre, so you’d need equipment that can meet its demands. Investing in the best possible equipment has immensely helped Luke along the way. The last thing you’d want is for your equipment to limit the potential you have to fully capture the moment. In night photography, having higher quality gear will always be worth the investment in the end.
Now, before you go out there and photograph the captivating night sky, Luke has some reminders for you. “Get out there and keep exploring! Enjoy the incredible feeling of spending the night under the stars.”
Not sure where to begin in preparing for your astrophotography session? We’ve got you covered. Be sure to check out the first part of this astrophotography series to learn how to find the perfect spot for your shoot. Part two discusses the essentials to pack so you’ll always come prepared. Good luck, and we wish you clear skies!